| CONTENTS:
TK560 Main
Communicators
Phasers
Tricorders
Helmets
Blasters
Stormtrooper Armor
Lightsabers
Astro-Mech Droids
How-to Guides
Cylon
Centurion
Viper Pilot Helmet
M41-a Pulse Rifle
Motion Tracker
B5 PPG
Retro
Box Designs
Repair/Restoration
Replica Parts
40th Anniversary
Replica
Weapons/Gear
Reenactment Units
ME262 Project
Civilian
Marksmanship Program |
M1
Garand Rifle
M1903 Springfield
Rifle
M1 Carbine
Discussion
Board
Lauren Photo Albums
Egner II
Design
Please
note, that the images, logos, and respected artworks, are property of
the original copyright owners. TK560 has no affiliation with any of the
intellectural property owners. This is a fan site dealing with movie and
television replica props, original GIjOE action figures, World War II
memorbilla, and marksmanship/ firearms interests. Most of the images used
on this site are photgraphed by the site owners. Official logos are used
to identify specific products/ manufacturers.
|
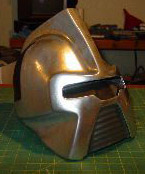
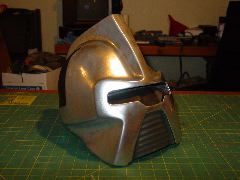
The finished
MK I helmet.
Note: a second
"improved" helmet kit is under construction. Check back
soon for updates to this "hero" version of the prop.
|
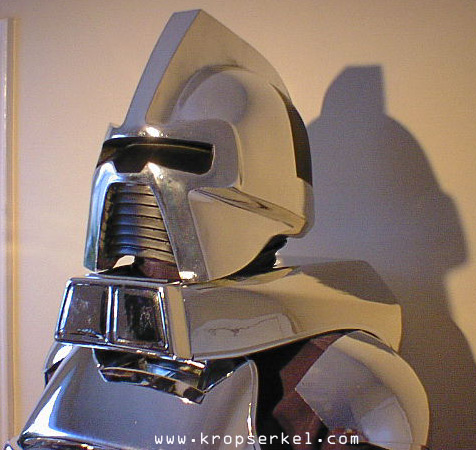
Cylon
Centurion Helmet
Another
great sci-fi prop to add to your collection. By your command.
First
of all, I'd like to say that it was years since I've seen Battlestar
Galactica, [until the DVD set was released in October] and when
I began research on this project, I was delighted to find that there
was "alive and well" BSG community on the internet. I
wanted to build a complete costume, like I did with my Stormtrooper
uniform. Unfortunately the cost for a "real" or "official"
one was prohibitive. I decided to start with just the helmet, [as
I did years ago with my Stormtrooper]. I searched several options,
fiberglass, resin, and vac-u-formed plastics, before choosing on
a vac-u-form styrene/resing kit. The following is a work in progress
that details the build up of this prop replica. Please note, I'm
not a big fan of "sending off" my stuff for others to
complete, even having a pro shop do the chrome plating, just so
you would know. Also, under the PAINTING
section, I have my experiments of different off-the-shelf chrome
options and techniques available for comparison.
The
kit is one of those "unofficial" versions, as there are
no known officially liscensed helmet only kits on the market. Check
the LINKS page for official BSG merchandise.
Click here
to request the source of the helmet by email. |
| Parts |
 |
The kit arrived
from the online seller in quick fashion, and was $65 plus shipping.
Now, for anyone who has never dealt with unofficial or garage made
kits, these things can be a little rough as compared to a commercially
produced piece. I was pleasantly surprised. The kit, although a
simple 4 part job, was fairly symentrical, and the vac formed plastic
moulds had cut lines as guides. The resin "eye" is less
symetrical and had numerous casting flaws. The "mouth"
piece was at first glance dissapointing, but furthur research revealed
there were originally 2 types of "mouths" , the one in
the kit is a "background' version.
|
| Materials |
Well,
the styrene kit needed to be trimmed, glued primed painted and chromed.
The following is my list of needed parts or supplies to finish this
kit:
|
|
Sharp
hobby knife [X-acto]
Sand
paper in various grits from medium to extra fine
Steel
wool 0000
Super
Glue and accellerant
Sharpie
fine tip marker
Body
filler glazine putty [Bondo spot putty] red kind
foil
type metal duck tape
Flat
spring type clamps
ruler
|
Takck
cloth
Primer
paint [gray or white]
Dark
gloss machine gray spray paint
Ultra
flat black spray paint
Glossy
Black for chrome undercoat
Gray
foam or Hard hat liner [optional]
2
part resin for building up the visor, JB quick weld or similar 1:1
resign will do.
electronics
for eye
electrnic
for warble and cylong voice |
| Building |
| The
following is a photo gallery detailing the building process. Please
note, this is not the only way to build the kit, and I used a lot
of liberty in making this one. Again, I tried to use hardware store
or auto parts store materials instead of special mail order stuff. |
|
 |
 |
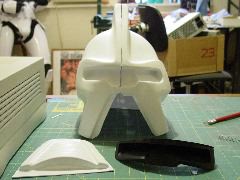
| Image
1 shows the kit as received from the seller. Note the instruction
sheet, visor and mouth pieces. |
Image
2 shows the amount of trimming needed to get started. The
visor area, will be done last. |
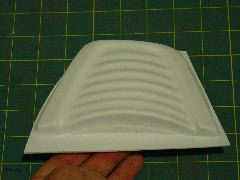
Image
3 shows the non symetrical visor part. this will require
some build-up to make work. |
 |
 |
 |
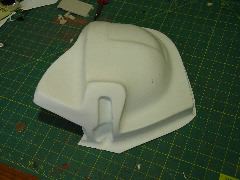
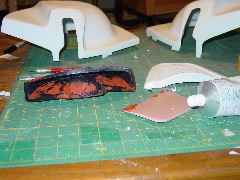
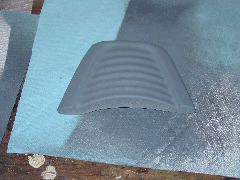
| Image
4 shows the mouth part, and is the "background type,
with less defined "vents". |
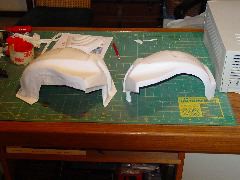
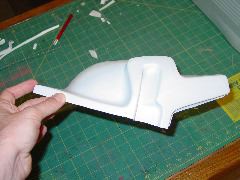
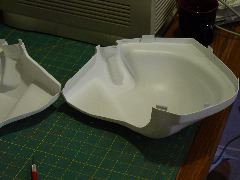
Image
5 shows a trimmed helmet half on the right and the as received
one on the left. Note the amount of trimming around the bottom of
the helmet. |
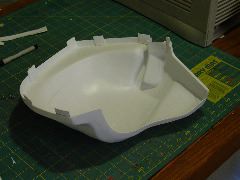
Image
6 details the "mohawk" trim. Note, the mouth area
and visor are not yet trimmed. |
 |
 |
 |
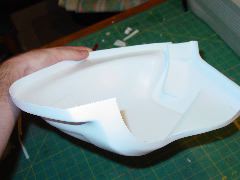
| Image
7 details the final trim without the visor slot cut. |
Image
8: The next step required the two halves to fit together
and hold its shape. Since these two halves do not overlap, and controling
the contact points needed to be considered, I decided at this point
to make my helmet a one piece unit. |
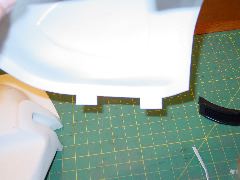
Image
9 I cut small strips of styrene from the excess trim materials,
and super glued them to make fingers. alternating them on each side
of the helmet halves. |
 |
 |
 |
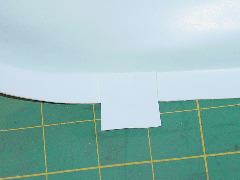
| Image
10 shows one side... |
Image
11 shows the other side... |
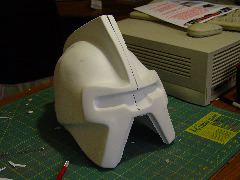
Image
12 shows that when fitted together the helmet starts to take
shape. |
 |
 |
 |
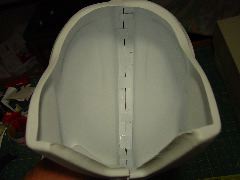
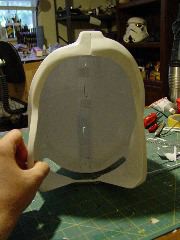
| Image
13 details the inside of the helmet. Note how the finger
strips inter mesh to hold its shape. |
Image
14 shows the parts of the kit up to this point. |
Image
15 shows the body filler applied to smoothe out the resin
visor casting flaws. |
 |
 |
 |
| Image
16 shows the non-symetrical shape of the twos parts. This
was discovered after the two halves were gluded together. |
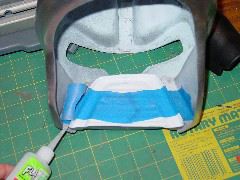
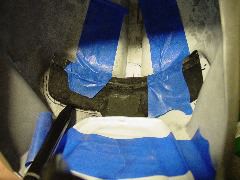
Image
17 shows masking tape applied to the inner side seam, to
act as a backstop for the body filler. |
Image
18 shows the body filler applied to the seam. Several layers
will be required. |
 |
 |
 |
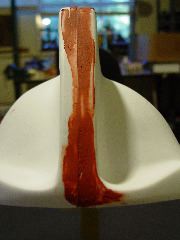
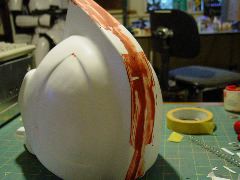
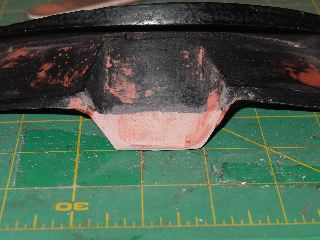
| Image
19 shows the body filler used to hide the seam. Note the
top is not even, and will require a build up. I kinda like the red
"mohawk"! |
Image
20 shows another view of the body filler applied. Styrene
is very easy to use and will take a lot of abuse before a repair is
necessary. Look-out though, styrene will melt and distort in hot weather
and is subject to melting with certain chemicals like finger nail
polish remover. |
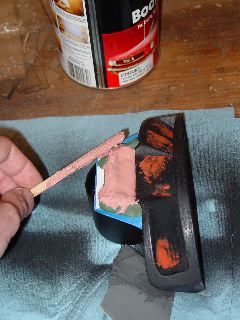
Image
21 I needed to extend the "nose bridge" section
about 3/4". So I built up a small form from hobby clay, masking
tape and carboard, mixed some Bondo and poured it in the form. Bondo
will set up in a few minutes, and was ready to sand. |
 |
 |
 |
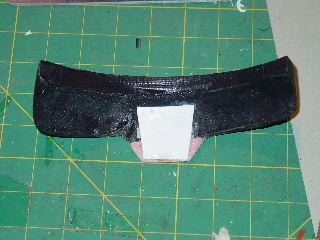
| Image
22 shows the backsideof the nose bridge extension, I reinforced
it with a strip of styrene from an old garage sale sign. Just super
Glue it into place. |
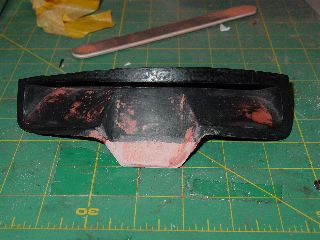
Image
23 shows some final sanding and some additional surface pinhole
repairs. Note the top portion, it needs to be more level, the left
side is considerably thinner than the right side. |
Image
24 shows a close up of the addition. Almost ready to paint.
There needs to be some additional material added to the top left portion
of the visor. |
 |
 |
 |
|
Image
25 shows the primer gray paint before a ultra flat black
top coat is applied. Note, the leftside has been rebuilt, using
a simple masking tape form, and Bondo then sanded to conform to
the final shape. |
Image
26 shows the painting of the ultra Flat black paint still
wet. The flash from the camera makes the black look glossy. It is
not. |
Image
27 shows the helmet shell ready for final primer coat. A
lot of defects will be revealed with the gray primer. |
 |
 |
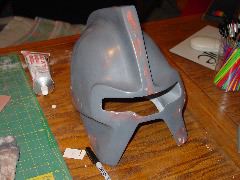 |
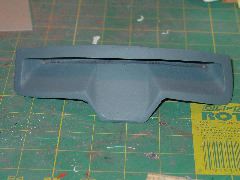
| Image
28 this is what the first coat of gray primer looks like.
Not bad, but some rough spots will need to be addressed. 2 more primer
coats will be necessary. |
Image
29 shows the mouth portion with the first of the two primer
coats. The finish coat will be a machine grey glossy with a Plasticote
Charcoal Gray topcoat dusting. This will simulate a gun metal finish. |
Image
30 shows final smoothing and defect filling using the body
filler. A final topcoat of primer will be added. On to chrome painting. |
 |
 |
 |
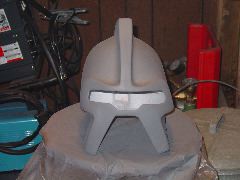
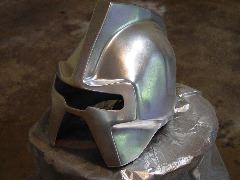
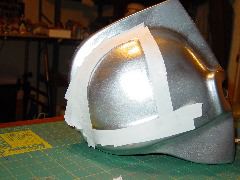
| Image
31 shows the initial application of the Krylon Original Chrome
paint. Not as shiney as real chrome, but will work for this project.
Several coats will be applied, and a final glossy topcoat will be
added to give it a little more shine. |
Image
32 shows the second coat of chrome paint. |
Image
33 Adding the mouth vent. |
 |
 |
 |
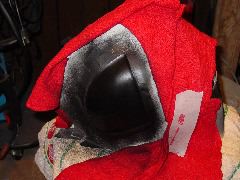
| Image
34 Marking the position of the visor. |
Image
35 making some tension splints for holding the visor. |
Image
36 masking for final accent color with a low stick masking
tape to define the outline. |
 |
 |
|
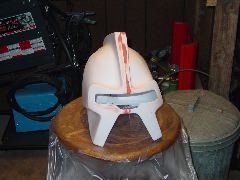
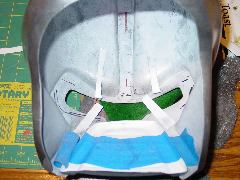
| Image
37 painting the accent color a flat black. |
Image
38 final product without electronics. |
Electronic
eye and "warble" sount to be added later. |
NOTE:
Bondo is a trade name as is used for gthe generic term Two-Part Polyester
Resin Auto Body Filler.
Super Glue is a trade name for Cyroacryllic glue
Xacto is a trade name Precision Hobby Knife.
Painting
I'm
a big fan of Krylon. Rustoleum is
ok, but the control of the Krylon for me works better. Below is the results
of several "spray chrome" paints. The Krylon "Original
Chrome" gives the best effect, but must be sprayed from a close distance,
no more than 4-6 inches from the surface, and every last trace of dust
will show up. Also, I have noticed the surface will release easily if
masking tape is applied. So when painting the rear indent areas, you might
want to do them first, mask the them, then paint the chrome last.
The
kit gets 2-3 coats of Krylon Sandable Gray Primer
The
visor gets 2-3 top coats of Krylon Ultra Flat Black
The
Mouth gets 2-3 top coats of Krylon Machine Gray and a dusting of Plasticote
Charcoal gray auto body paint.
The
helmet shell gets one heavy coat of Krylon Original Chrome
The
helmet indents get 1-2 coats of Krylon Ultra Flat Black
Let
the helmet dry for several days. The chrome will lift, and there will
be some fingerprinting. Only other option is a Pro Shop Chroming service.
Price Range is $80 to $150 for the shell. Ouch!
Here
is the chrome finish samples:
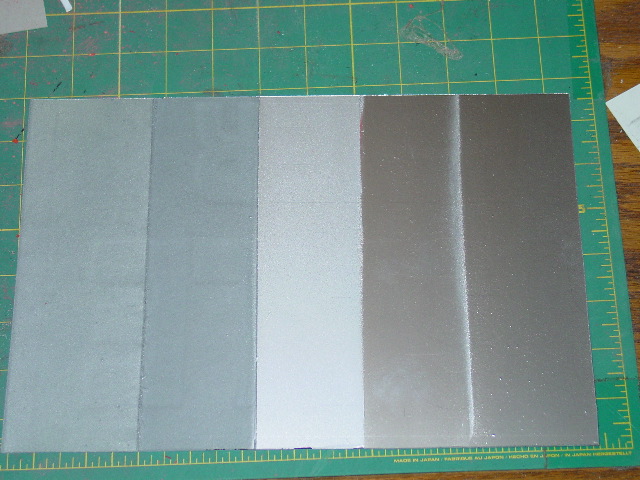
I prefer
the one on the far right, the Krylon Original Chrome, next to that one,
is Krylon's short can of chrome, in the middle is Rustoleum Spray Silver,
and on the left, is the Krylons with a polyurethane topcoat, yuck.
Finishing
Detailing
this project consisted of superglue-ing the mouth piece to the front,
and mounting the visor. I wanted to remove the visor part in the future
so that I could add electronics, I tension bracked mounting system was
devised with strips of styrene.
Conclusion
This
was a fun project, that did not require a lot of time or special supplies
or equipment. If I were to do it again. I would not use the provided visor,
but make my own. Also, having the helmet chromed would be a nice touch,
but expensive $65 to $100. More that the cost of the helmet and the paint!
For the prop maker on a budget this is a good alternative. Add a foam
sweatband, and cut the eye slot, and you can wear it!
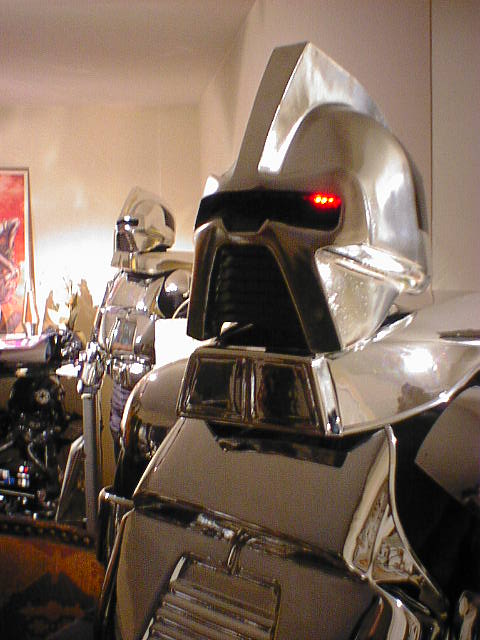
References
the
following images are collected from the web. Try Google
image search for cylon.
Here
is an excellent reference page for a real Cylon!
Thanks Starbuck!
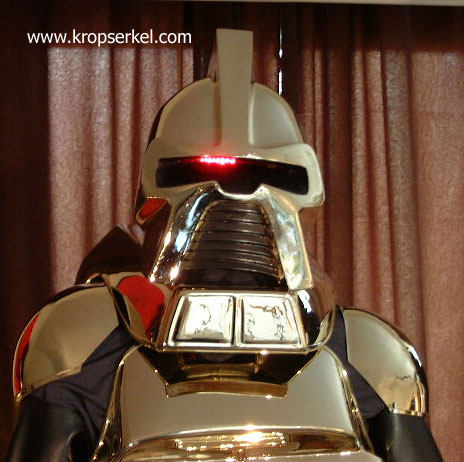
Links
KROPSERKEL
Prop collection page has good info on Cylons. Check out this page. www.kropserkel.com/cylon.htm
WeGottaFindEarth.com
Cylon suit reference
Page with images of a real Cylon suit and helmet.
www.battlestargalactica.org
offically liscensed BSG gear, although sometimes hard to get.
www.jcwhitney.com
Eye electronics source.
www.cylong.org
a Cylon news site.
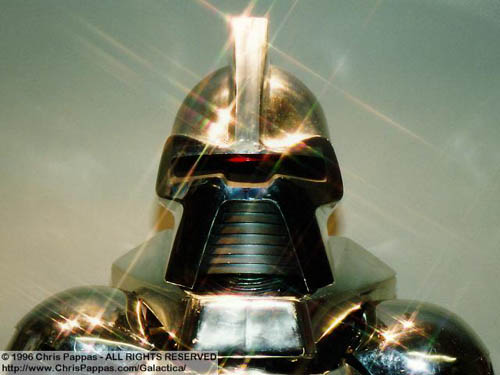
Replica
Prop Forum - grandaddy of all prop collecting discussion boards. [membership
required]
www.ChrisPappas.com
- veteran collector of original BSG props.
Last
update: March 30, 2006
|