
CONTENTS:
Star
Trek TOS Props |
Communicators
Phasers
Tricorders
Star
Wars EP IV-VI Props |
Helmets
Blasters
Stormtrooper Armor
Lightsabers
Astro-Mech Droids
How-to Guides
Misc.
Sci-Fi Props |
Cylon
Centurion
Viper Pilot Helmet
M41-a Pulse Rifle
Motion Tracker
B5 PPG
1964-1976
GIjOE Figures |
Retro
Box Designs
Repair/Restoration
Replica Parts
40th Anniversary
World
War II Militaria |
Replica
Weapons/Gear
Reenactment Units
ME262 Project
Civilian
Marksmanship Program |
M1
Garand Rifle
M1903 Springfield
Rifle
M1 Carbine
Other
Stuff |
Discussion
Board
Lauren Photo Albums
Egner II
Design
Please
note, that the images, logos, and respected artworks, are property of
the original copyright owners. TK560 has no affiliation with any of the
intellectural property owners. This is a fan site dealing with movie and
television replica props, original GIjOE action figures, World War II
memorbilla, and marksmanship/ firearms interests. Most of the images used
on this site are photgraphed by the site owners. Official logos are used
to identify specific products/ manufacturers.
Build your own Star Trek The Original Series Phaser I & II
The following tutorial is the work of Will from PA, and you might have seen his work in the ASAP boards. A few months ago, he asked that I host some of his images on this site. After adding a host of images, templates, and works in progress, Will and I are presenting this tutorial on how to make your own Star Trek Phaser from scratch. Follow along with the construction, down load the templates and get in the shop and build you one. Will has been making communicators and phasers for years, and now he wants to share his experiences with the prop building community. Click here to learn how to make your own Star Trek Communicator. Also learn how to make your own TOS Tricorder too!
Supplies |
Tools |
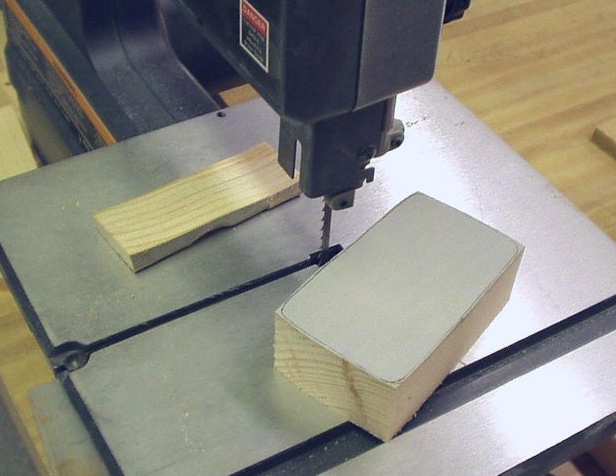
| wood(any
2x4 will do) |
Band
Saw |
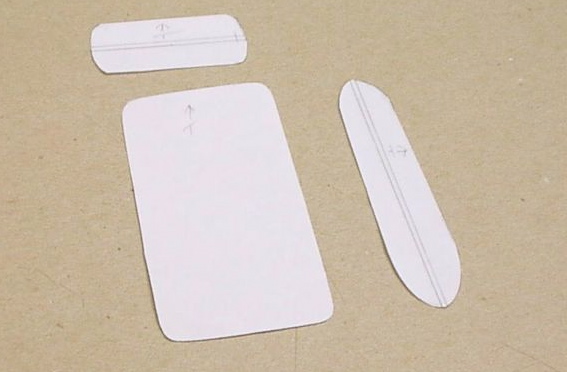
The Reference Prop
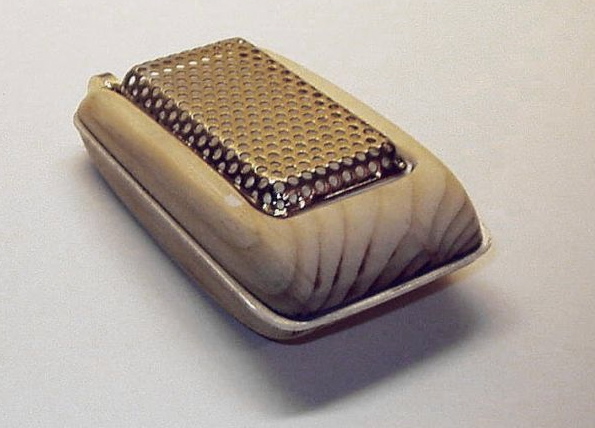
| Here is the reference phaser. This is one of the prop replicas that you use to be able to find at the SciFi conventions. The maker is unknown but possibly made by Starland. Will uses a carpenters contour guide to make the templates from. |
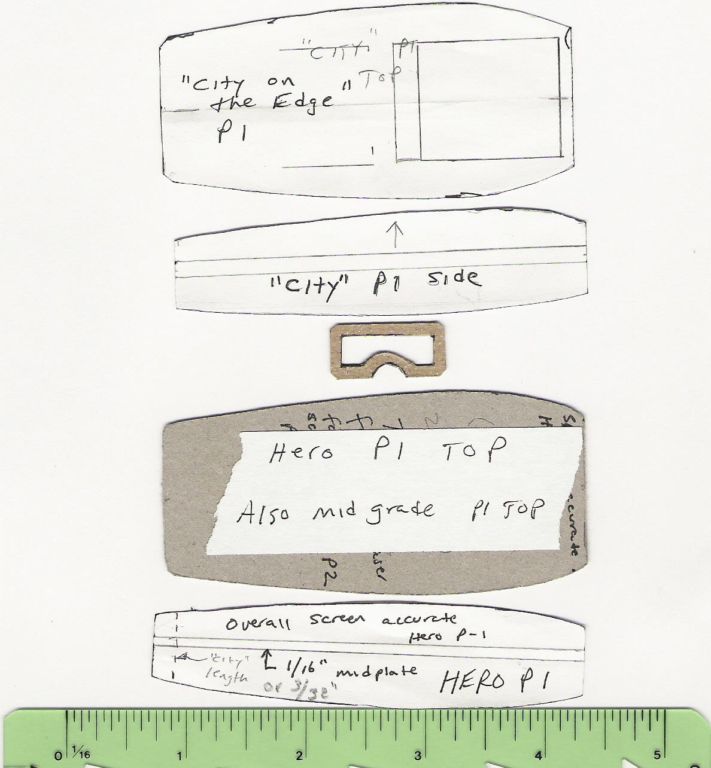
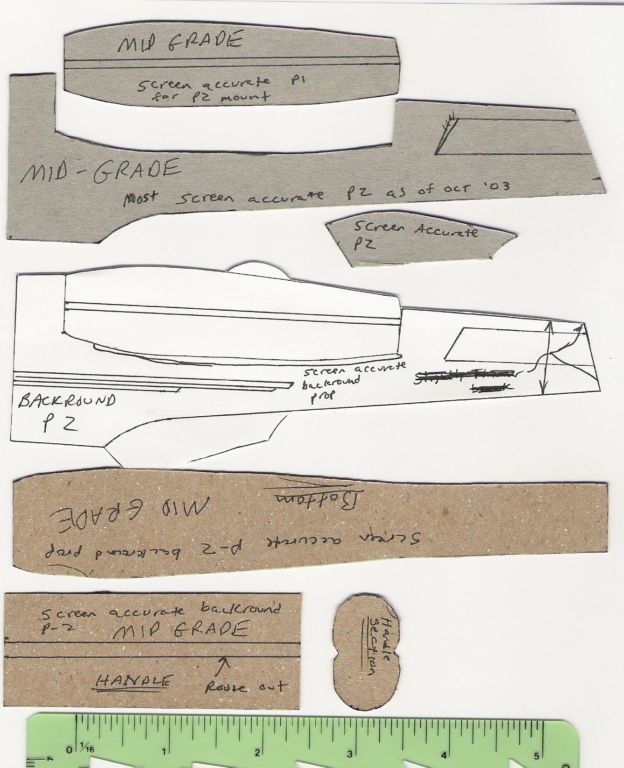
Templates
 |
Download the Phaser I template file. Download the Phaser II template file. Print it out on your printer. The scale is there to provide a reference for scale. |
Body Construction
 |
 |
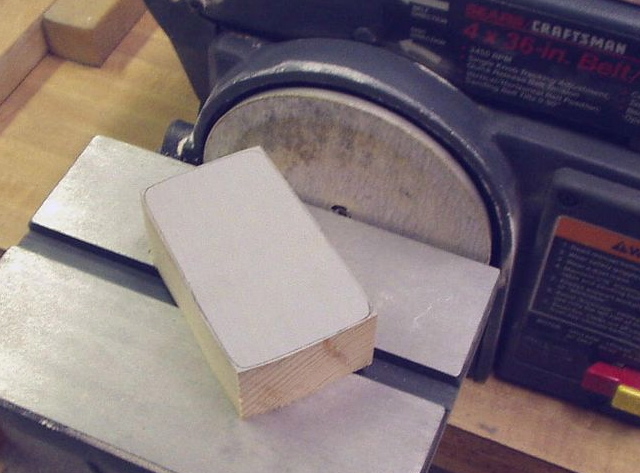 |
| STEP 1: trace the templates onto the wood block | STEP 2: cut out rough shape by hand or by using a band saw | STEP 3: disk and belt sand to trace line |
 |
 |
 |
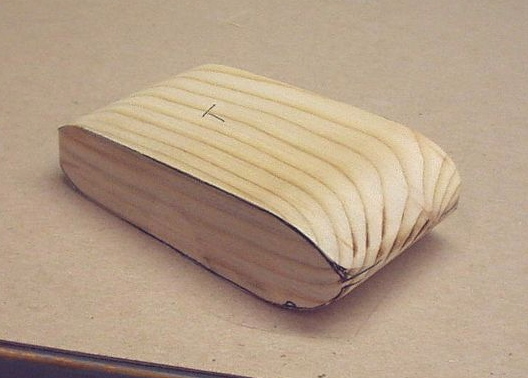
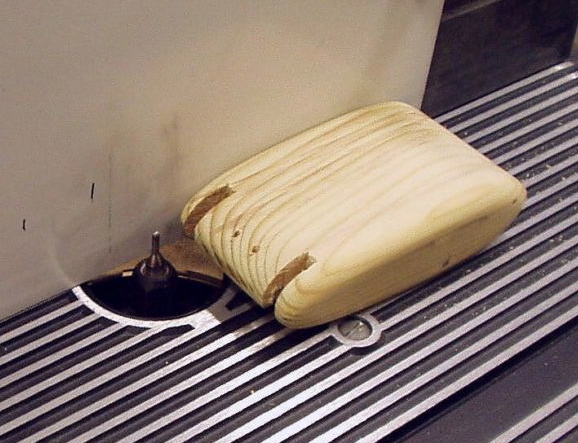
| STEP 4: trace side template.Remove most material with band saw then sand | STEP 5: disk and belt sand side profile | STEP 6: rough block ready for antenna wheel and panel cutout |
 |
 |
 |
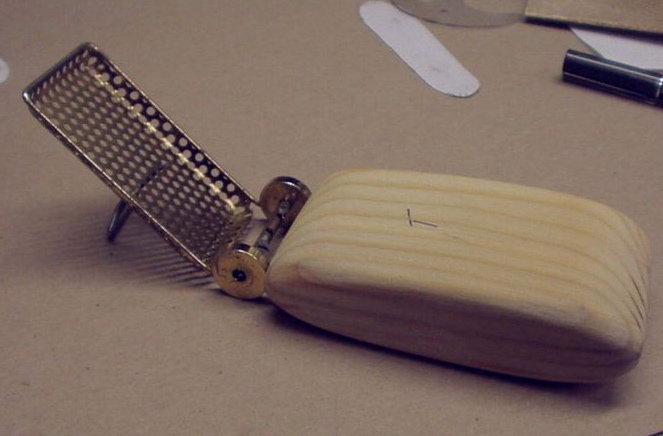
| STEP 7: a router is usefull for hollowing out panel area | STEP 8: rough antenna fit | STEP 9: cut slots for wheels.Mark panel cutout using antenna |
 |
 |
 |
| STEP 10: chiseled out panel area | STEP 11: styrene insert for panel area so no sanding of chiseled area is required.This will all be puttied in later | STEP 12: styrene insert and hinge detail-note axle is removable via two small screws |
 |
 |
 |
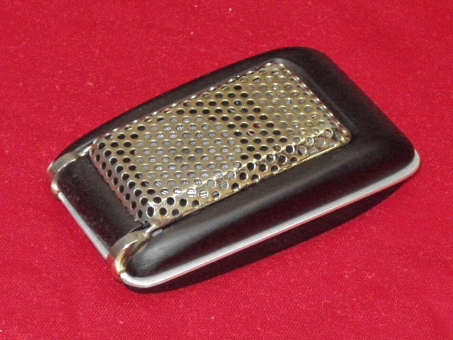
| STEP 13: rough fit the grill | STEP 14: Exploded view of the two parts | STEP 15: Putty the styrene/wood seams. |
 |
 |
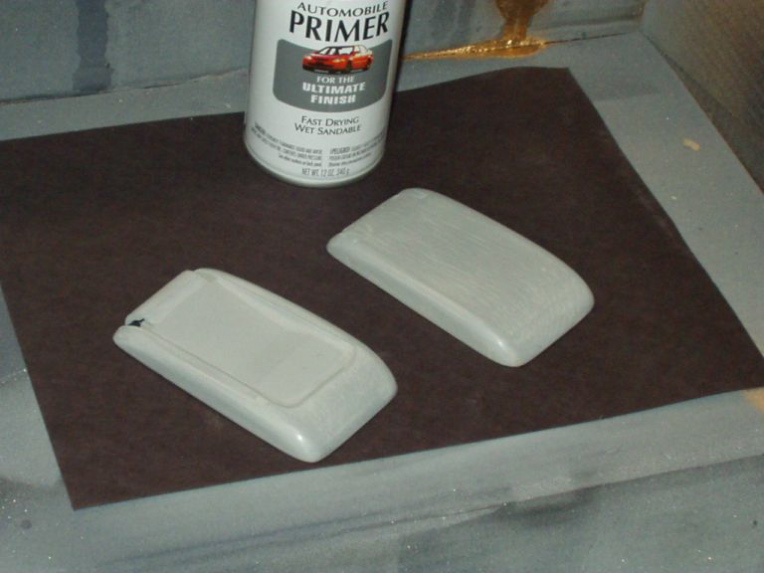 |
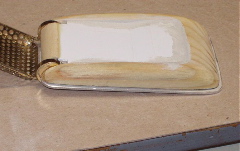
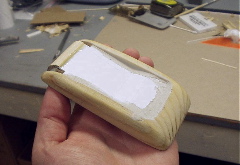
| STEP 16: Sand and fill with epoxy. Sand all surfaces smooth. | STEP 17: Dry fitting prior to painting. | STEP 18: primer 5 coats |
 |
 |
 |
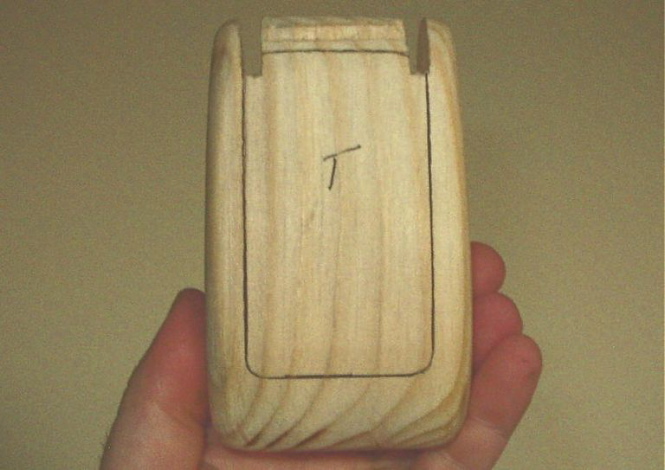
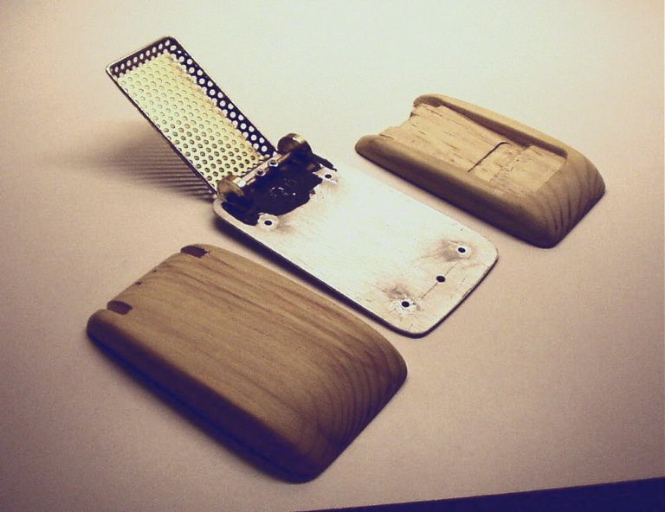
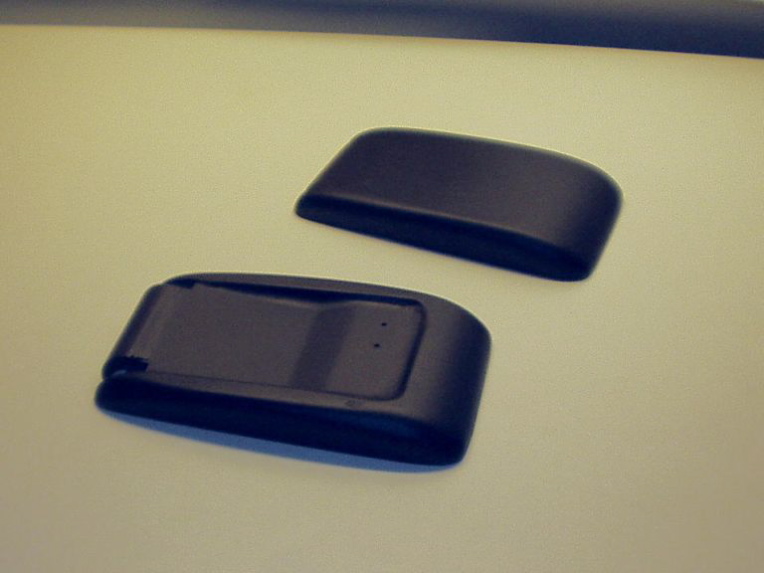
| STEP 19: painted halves.I used duplicolor flat black lacquer -about 5 coats | STEP 20: halves epoxied to mid plate and parts ready for gluing | STEP 21: last look with no parts.notice holes for train wheel shafts |
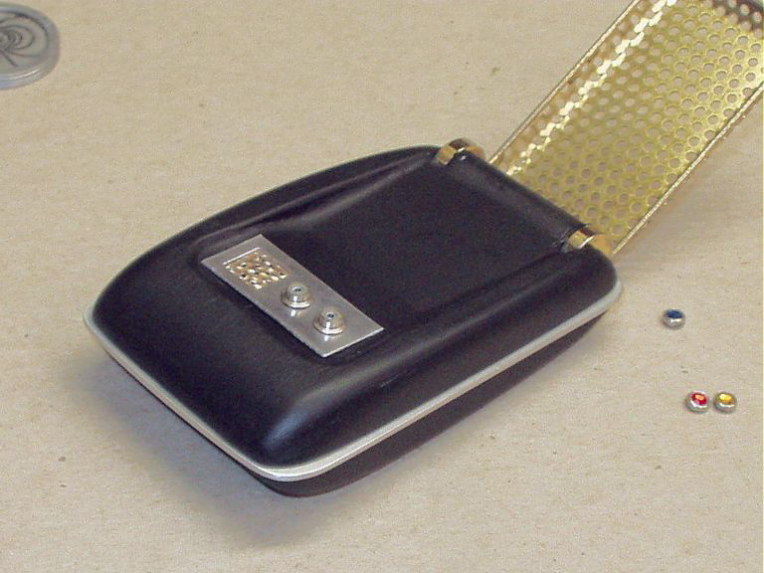 |
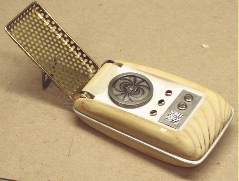
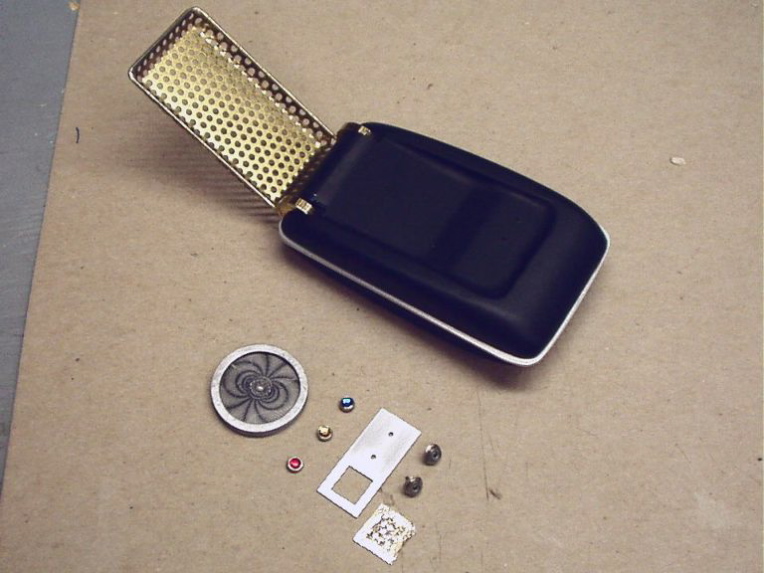
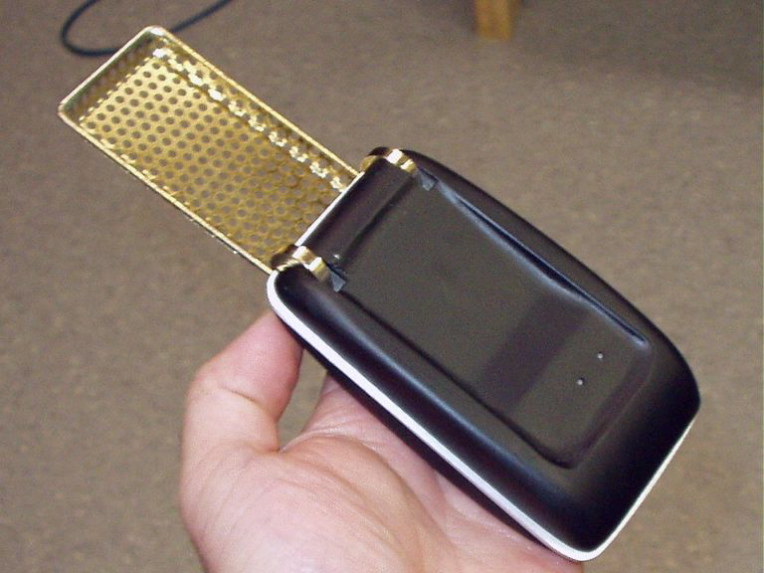
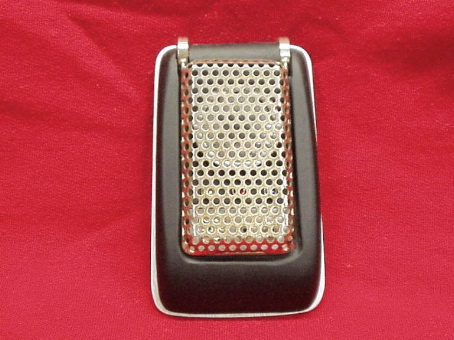
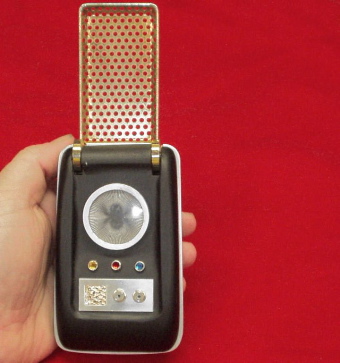
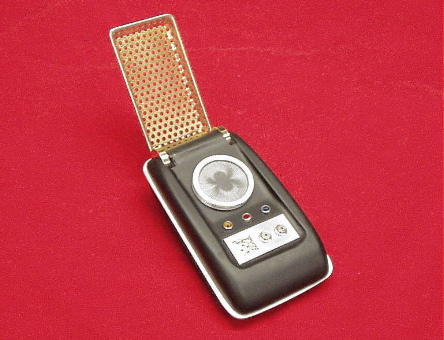 Finished replica. |
|
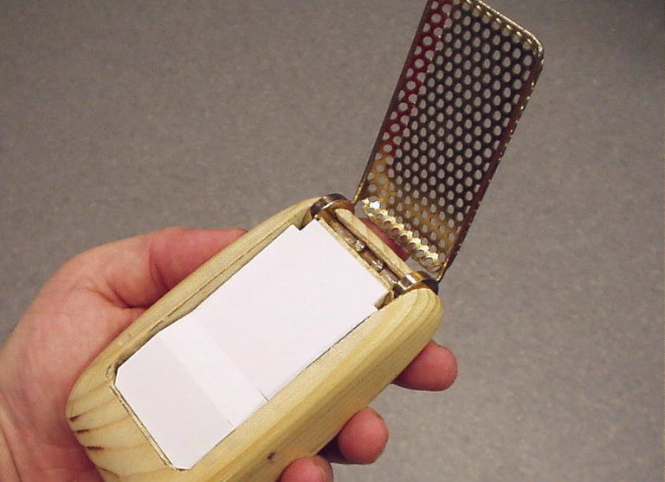
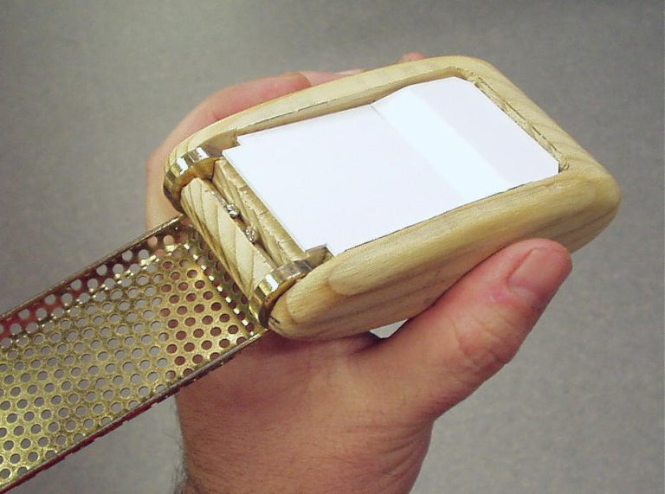
| STEP 22: panel,knobs ,and screen are in. (the screen is a piece of kitchen foil pressed into a window screen with 1/32" holes punched in,then painted gold) and only the foil is actually glued on. | ||
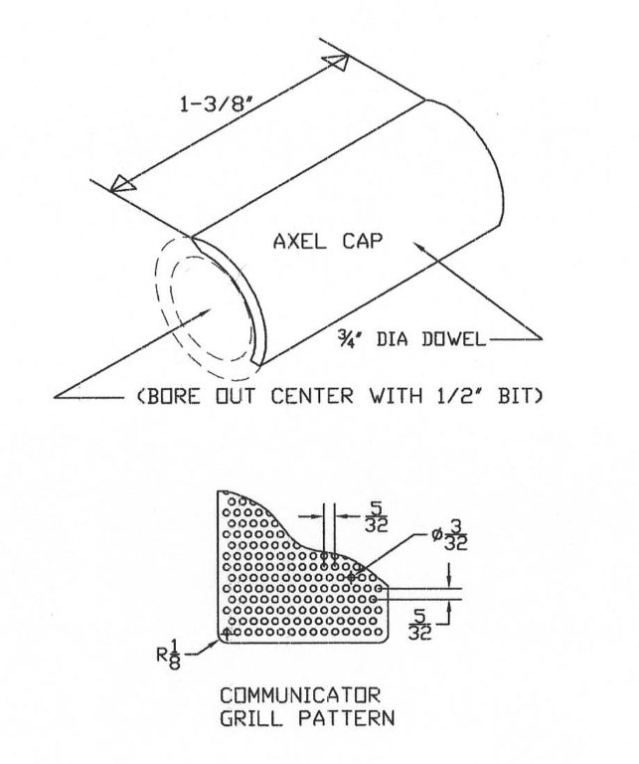
Grill Construction
[more
images pending] [template pending]
Draft a grid on a piece of paper (3/32 hole on a 5/32 spacing staggered
alignemnt)
Lay the grid on sheet metal
Punch each intersection of the grid using awl
Drill each punch mark with 3/32" bit (approx 200 holes to drill)
Fold the flat piece of sheet metal to form the shape of the grill
Bend the coat hanger to fit around the grill and bend at approx 45 degrees
at the ends.
Cut 2 sections from a 1/2" metal rod for the wheels.Drill axle holes(
I just use an 8 penny nail for the axle)
Drill into the wheels using a bit the size of the coat hanger (usually
1/16")
Stick the free ends of the coat hanger frame into the wheels
Crazy glue the grill onto the frame (crazy glue allows you to "spot
weld" metal together.
Another option is to purchase some of the correct grid material. One source would be the cheap grill materials for speakers found at the local Raido Shack.
A final option would be to purchase the correct material from a wholesaler. This can be expensive. One quite for a 4' x 8' sheet of grill materials was into the hundreds of dollars. Ouch.
Morie' Disk
Information pending, but for now, a good source is old computer hard drives! The old Conner series "Tall" type drives have aluminum bushing on the inside that are nearly perfect. Stack three together and volia! Instant morie` disk. [images pending]
Control Panel
Information pending, but for now consider a 1/16 thick aluminum stock. Cutting the "speaker" square hole is the hardest part. [images pending] [template pending]
Jewels & Bezels
Information pending. but most hobby stores have lots of jewels or rhinestones. [images pending]
Finished Prop
 |
 |
 |
 |
 |
 |
 |
|
 |
*note: all images
regarding the construction of the communicator body are property of Will,
PA. Used with permission.